Steeking Methods Series: Part 1B: Hand Sewn Steek for Making Openings for Merele (Necks, Sleeves, and Pockets)
The steek shown here creates small opening in the middle of the knitted fabric the same way you might make for a sleeve or a pocket. If you are using something a bit more slippery like a silky super wash yarn then this hand sewn steek will provide a bit more reinforcement. If you are nervous about the strength of your steek, you can always run it over with a sewing machine after you made your cut.
HAND SEWN BACK STITCH STEEK
This method creates a barrier formed of back stitch sewing. This is a good method when using non-superwash slippery yarns. Use matching yarn or polyester sewing thread.

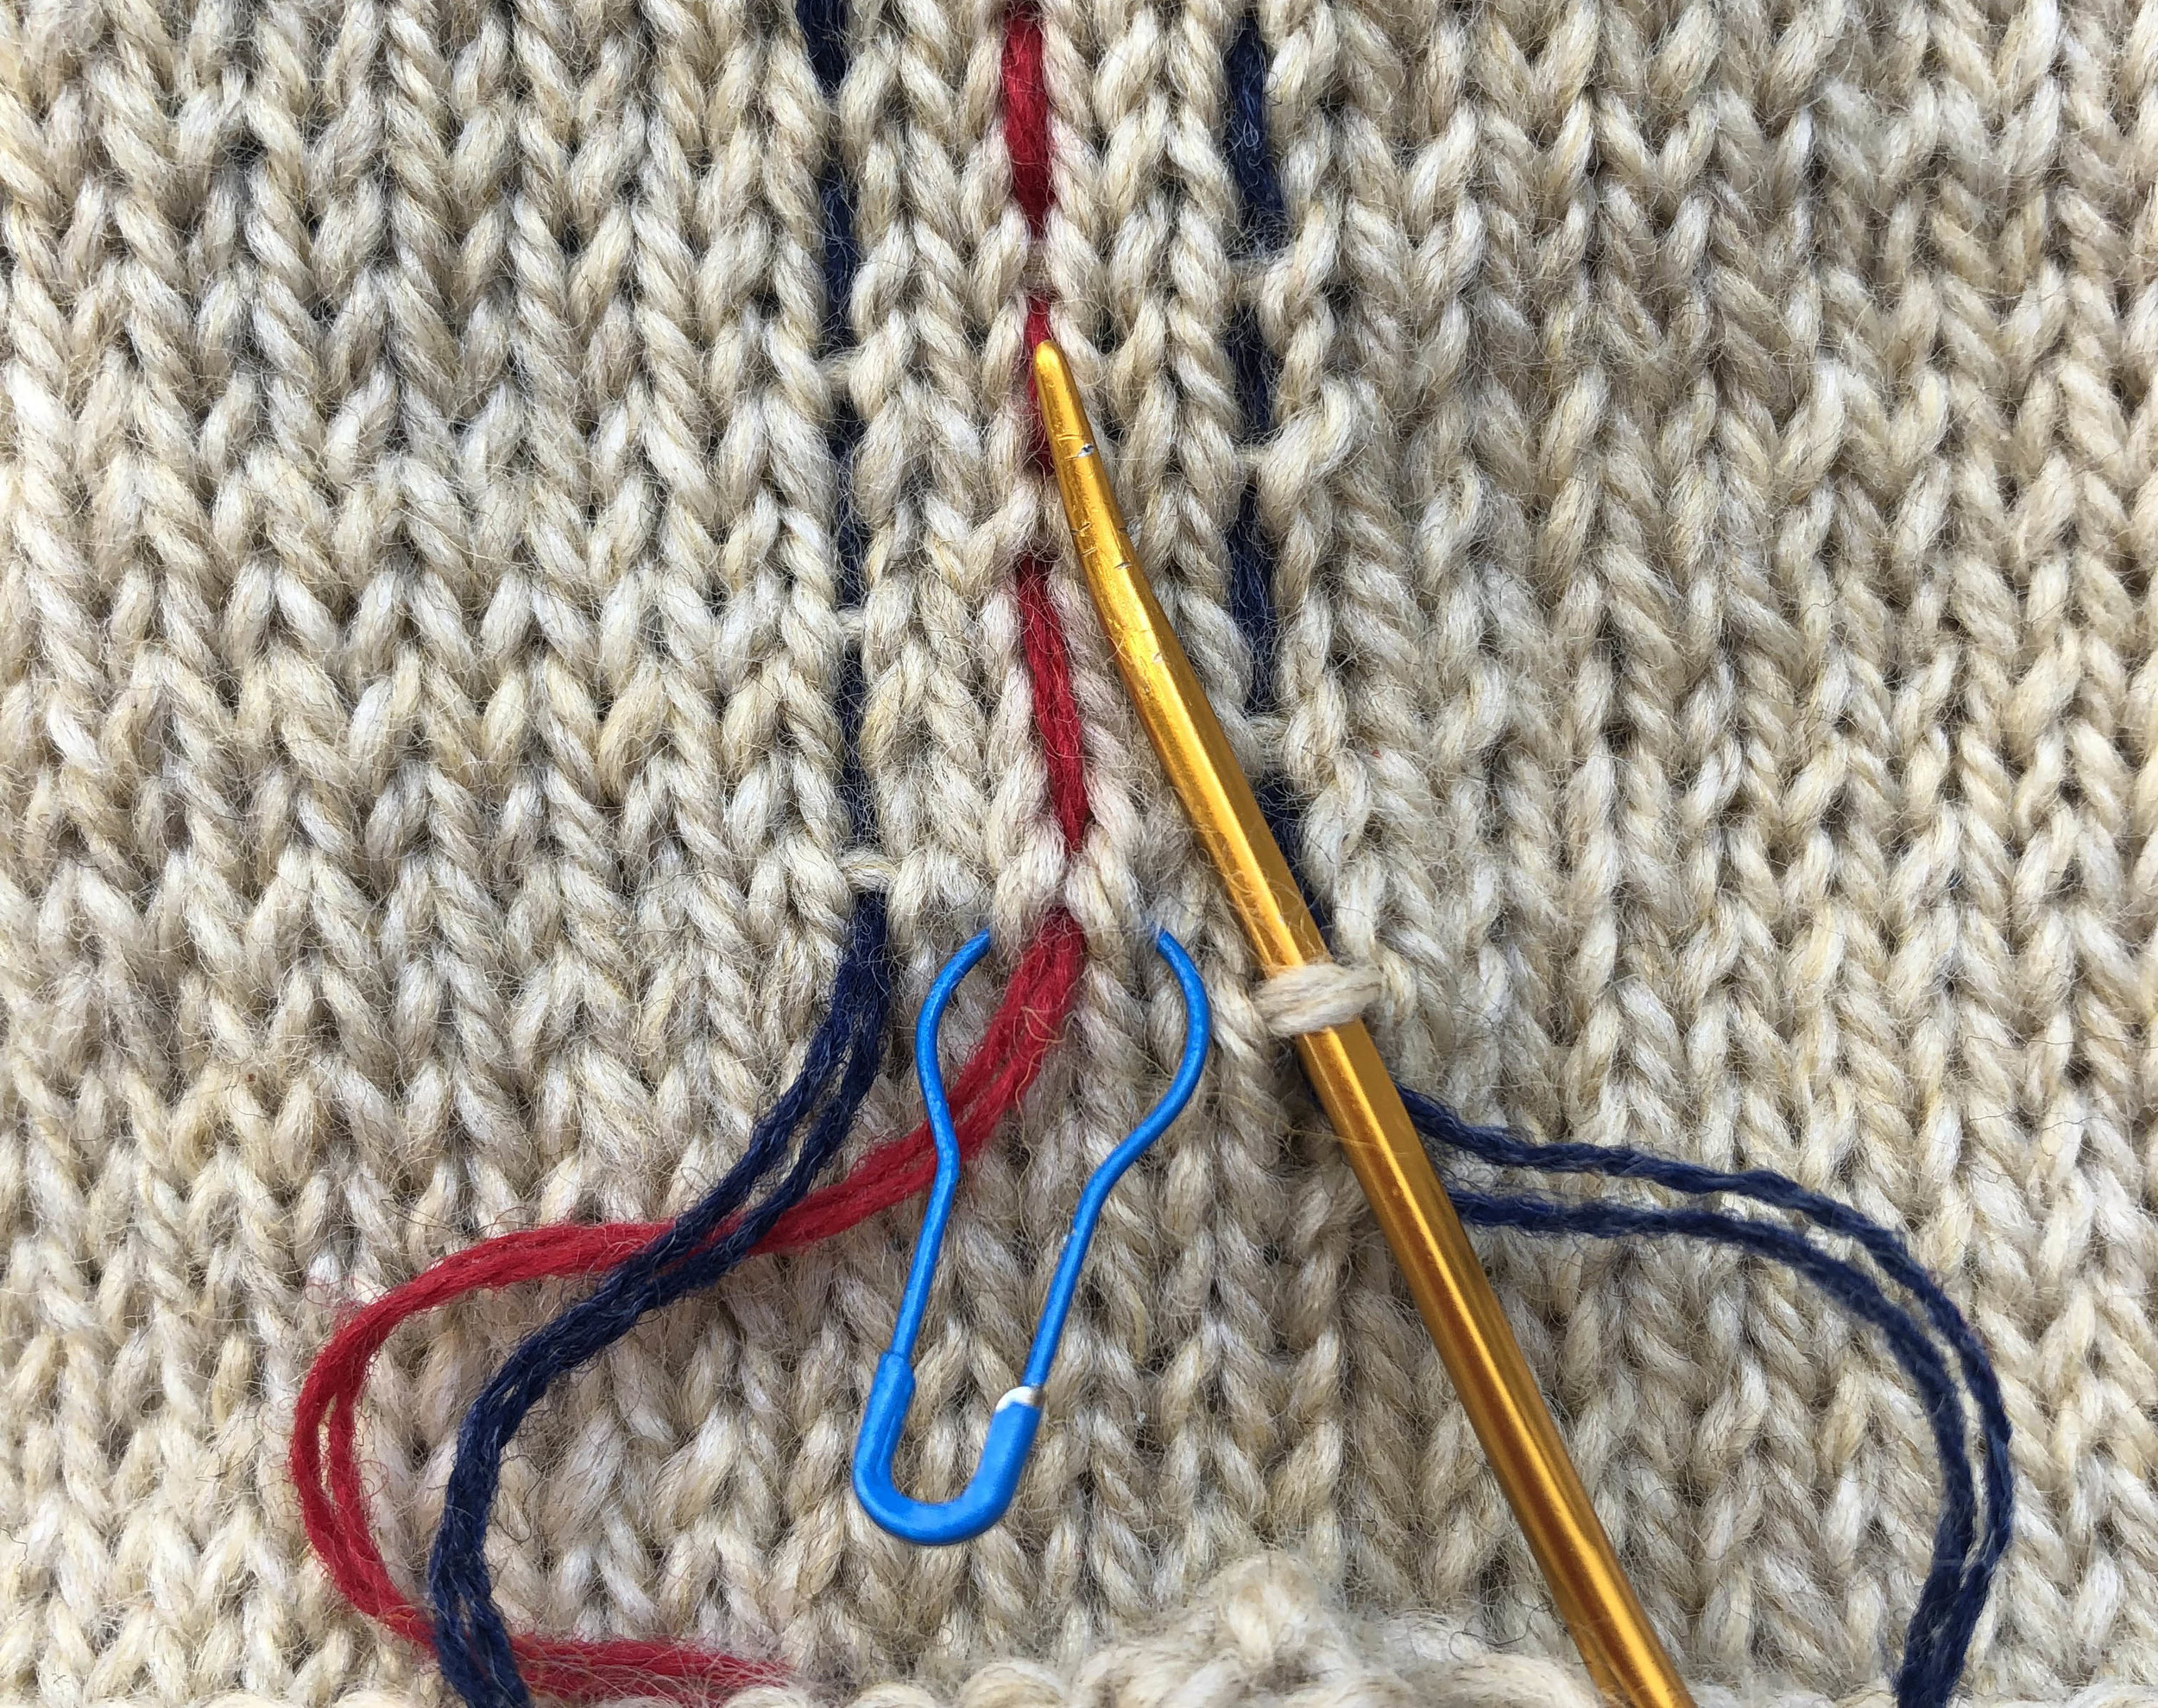
PPlace stitch markers to mark the start and end of the length you want your steek. Then run some thread or scrap yarn in a contrasting color (shown in red) through the middle of every other stitch in the column you plan to cut. This will guide you when cutting. Then run some thread or scrap yarn in another contrasting color (shown in navy) through the middle of every other stitch in the columns two stitches to the left and right of the cut column marked in red. The navy thread shown in the photo marks the area where the back stitching will be done.

With your tapestry needle, insert the needle into the middle of the first stitch marked in the navy thread (two stitches to the right of the stitch marked with a stitch marker) going under the middle bar. Pull your thread through leaving a tail for sewing in.
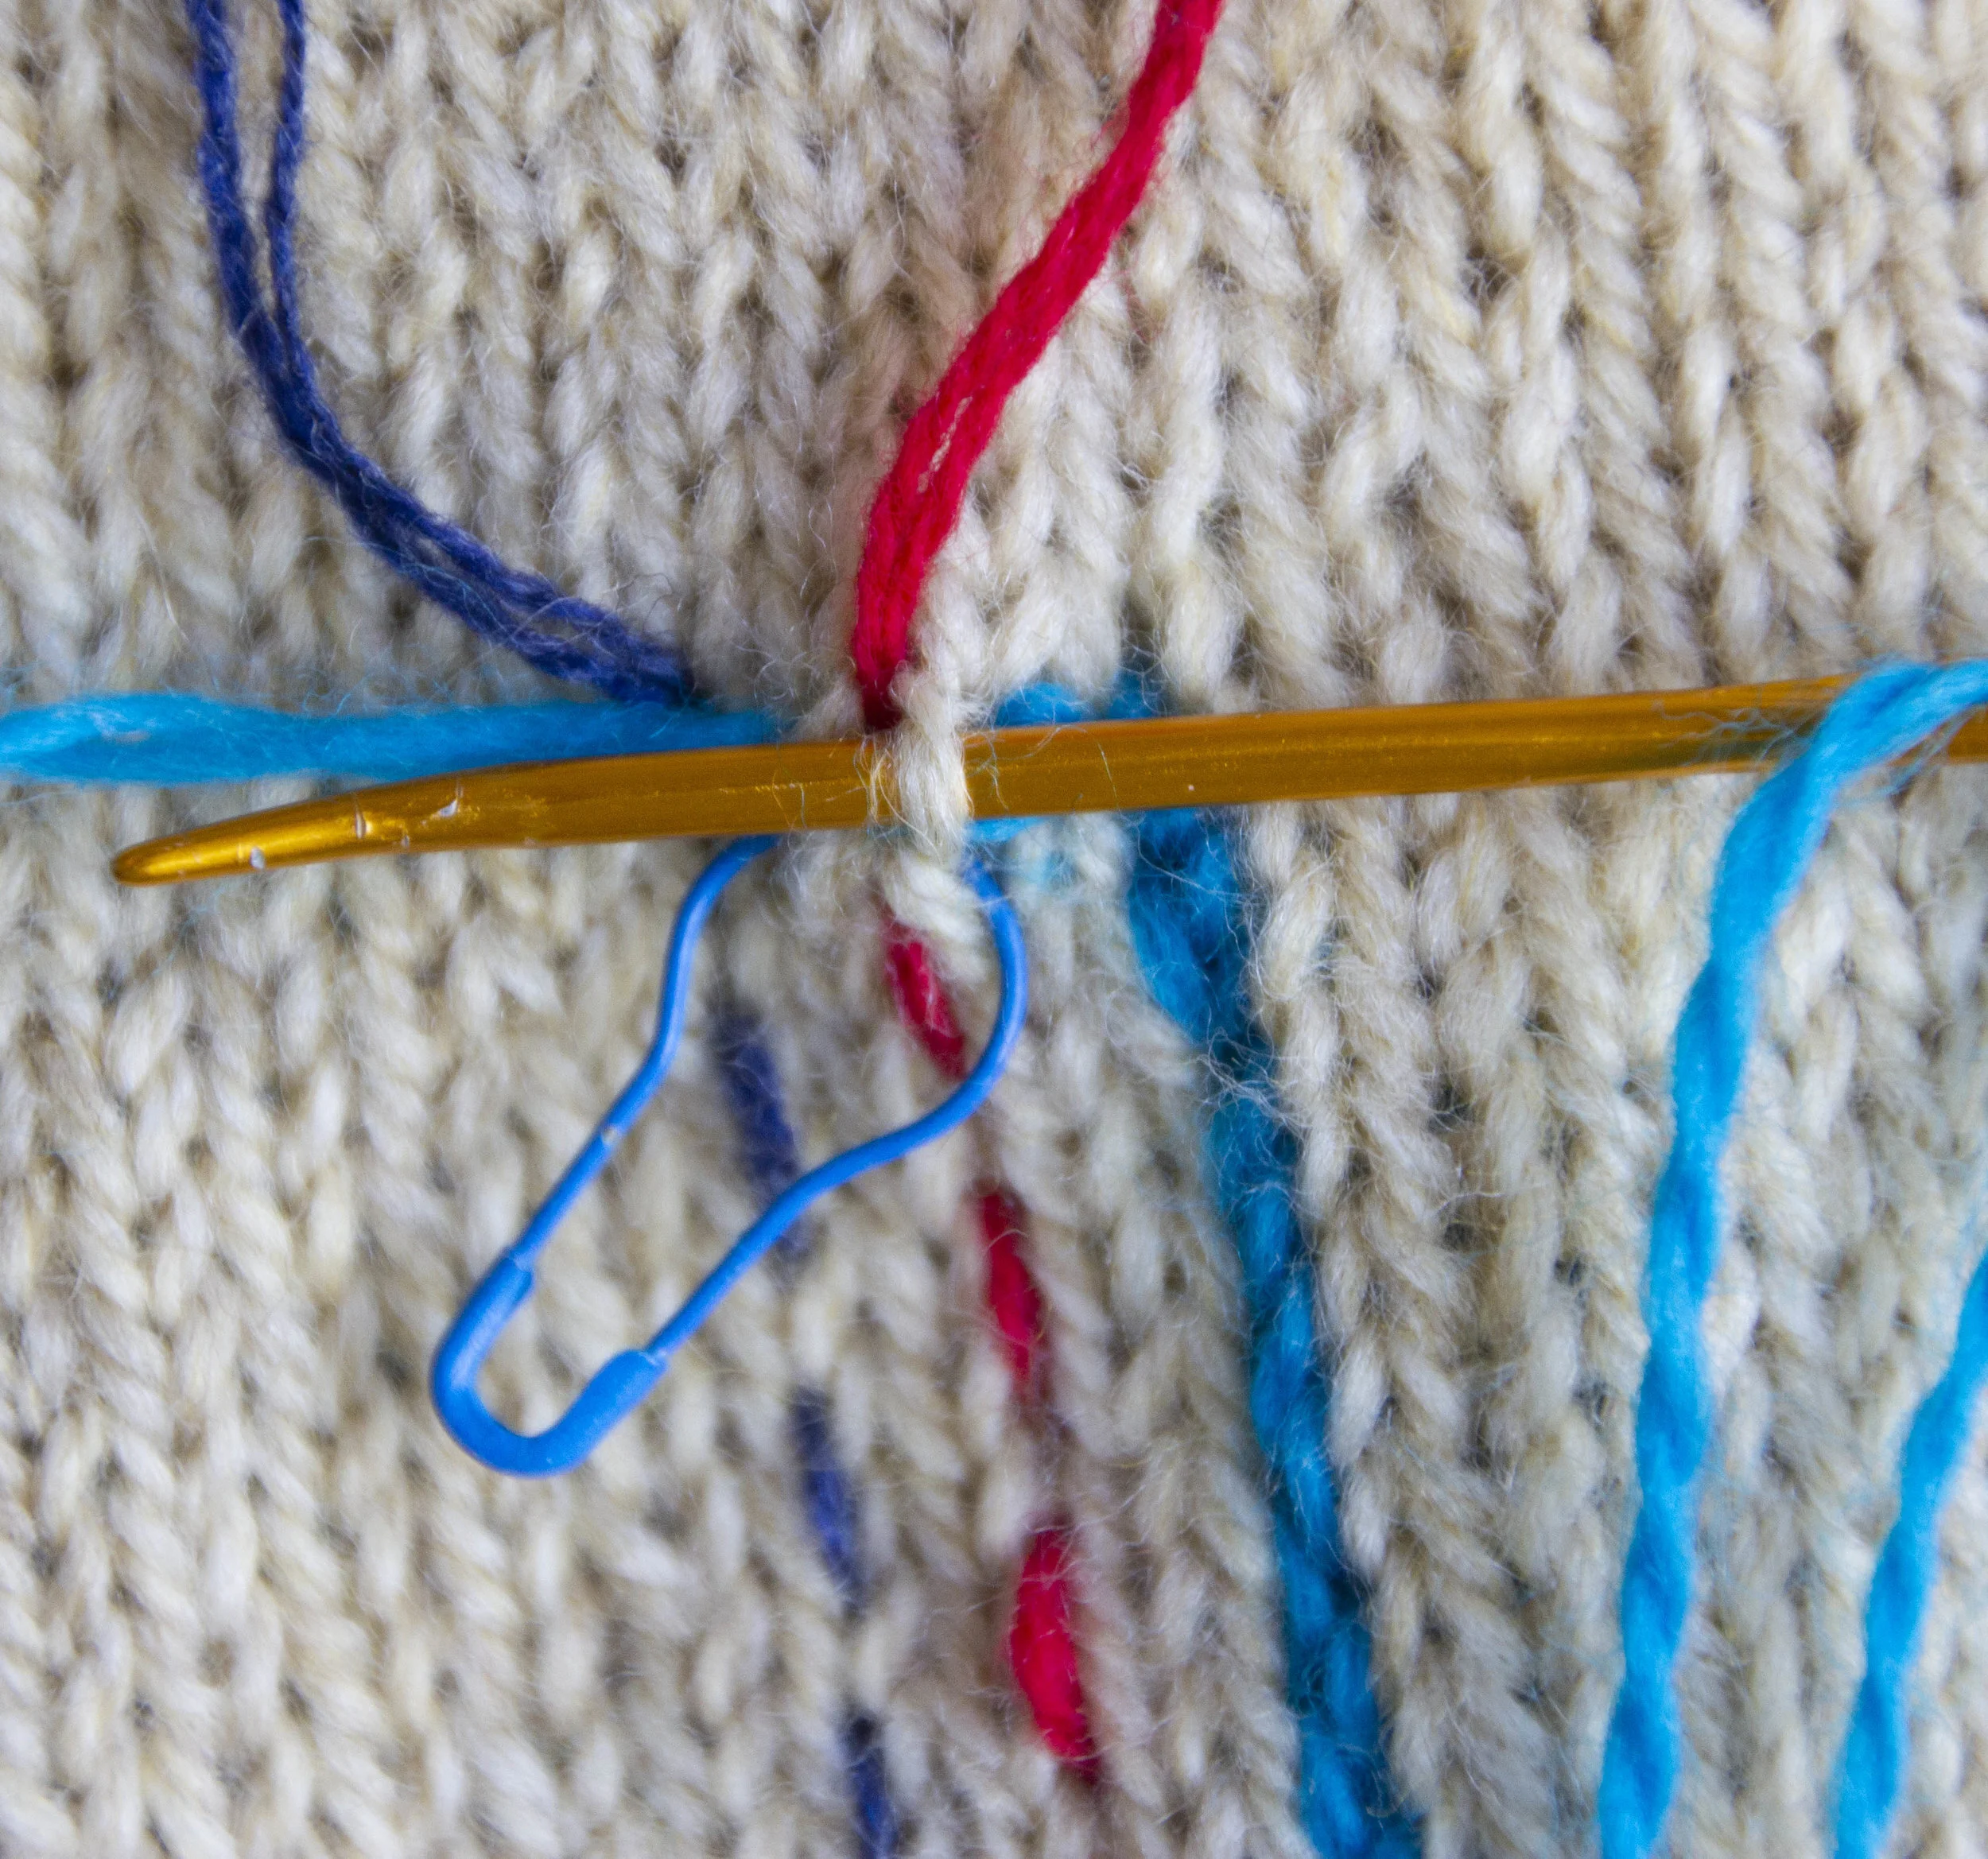
Bring your needle back around and pull it through the same spot you just did.

Now thread your needle under the next two bars above the one you just worked. Pull through.

Bring the needle back down one bar and pull it through.
This is the step that will be repeated with a mantra of: forward two, back one; forward two bars, back one bar. This forms the back stitch.

Continue working your back stitch (two forward, one back) along your marked column until you have worked the stitch adjacent (2 stitches to the right of the top stitch marked with a stitch marker). You will pull your needle through the middle of the stitch above (when going two forward) and then again through your end point (one back).

From left to right: Yarn pulled through two stitches forward, then pull yarn through one stitch back.

Now we start the turn.
Insert the needle now into under the left leg/half of the stitch whose middle bar you worked and the right leg/ half of the stitch to the left. Pull through.

Now insert your needle into the first leg/half stitch from the pair of half stitches you went under.

Insert your needle into the next set of two half stitches. Pull through.

Insert the needle now under the first leg/half of the stitch of the pair you went under in the previous step. Pull through.
Repeat these steps once more which will get you to the second navy marked column.

Now insert the needle into the two middle bars going down the navy marked column. This will be the start of the back stitch down the other side (work just like the other side; forward two, back one; forward two bars, back one bar.)

Showing the steps from left to right.
Insert your needle into the next set of two half stitches. Pull through.
Insert the needle now under the first leg/half of the stitch of the pair you went under in the previous step. Pull through.
Continue working your back stitch (two forward, one back) along your marked column until you have worked the stitch adjacent (2 stitches to the left of the bottom stitch marked with a stitch marker). You will pull your needle through the middle of the stitch below (when going two forward) and then again through your end point (one back).

Final turn. Work in the same way you did for the previous turn.
Insert the needle now into under the left leg/half of the stitch whose middle bar you worked and the right leg/ half of the stitch to the left. Pull through.
Now insert your needle into the first leg/half stitch from the pair of half stitches you went under.
Insert your needle into the next set of two half stitches. Pull through.
Insert the needle now under the first leg/half of the stitch of the pair you went under in the previous step. Pull through.
Repeatthese steps once more which will get you to the second navy marked column.
To finish and secure, insert the needle into the two middle bars along the column of back stitches on that side starting from the furthest bar going towards the end point.

Before pulling all of your thread/ yarn through, pull needle through the loop created to make a knot. Repeat this action using the tail left at the very beginning.

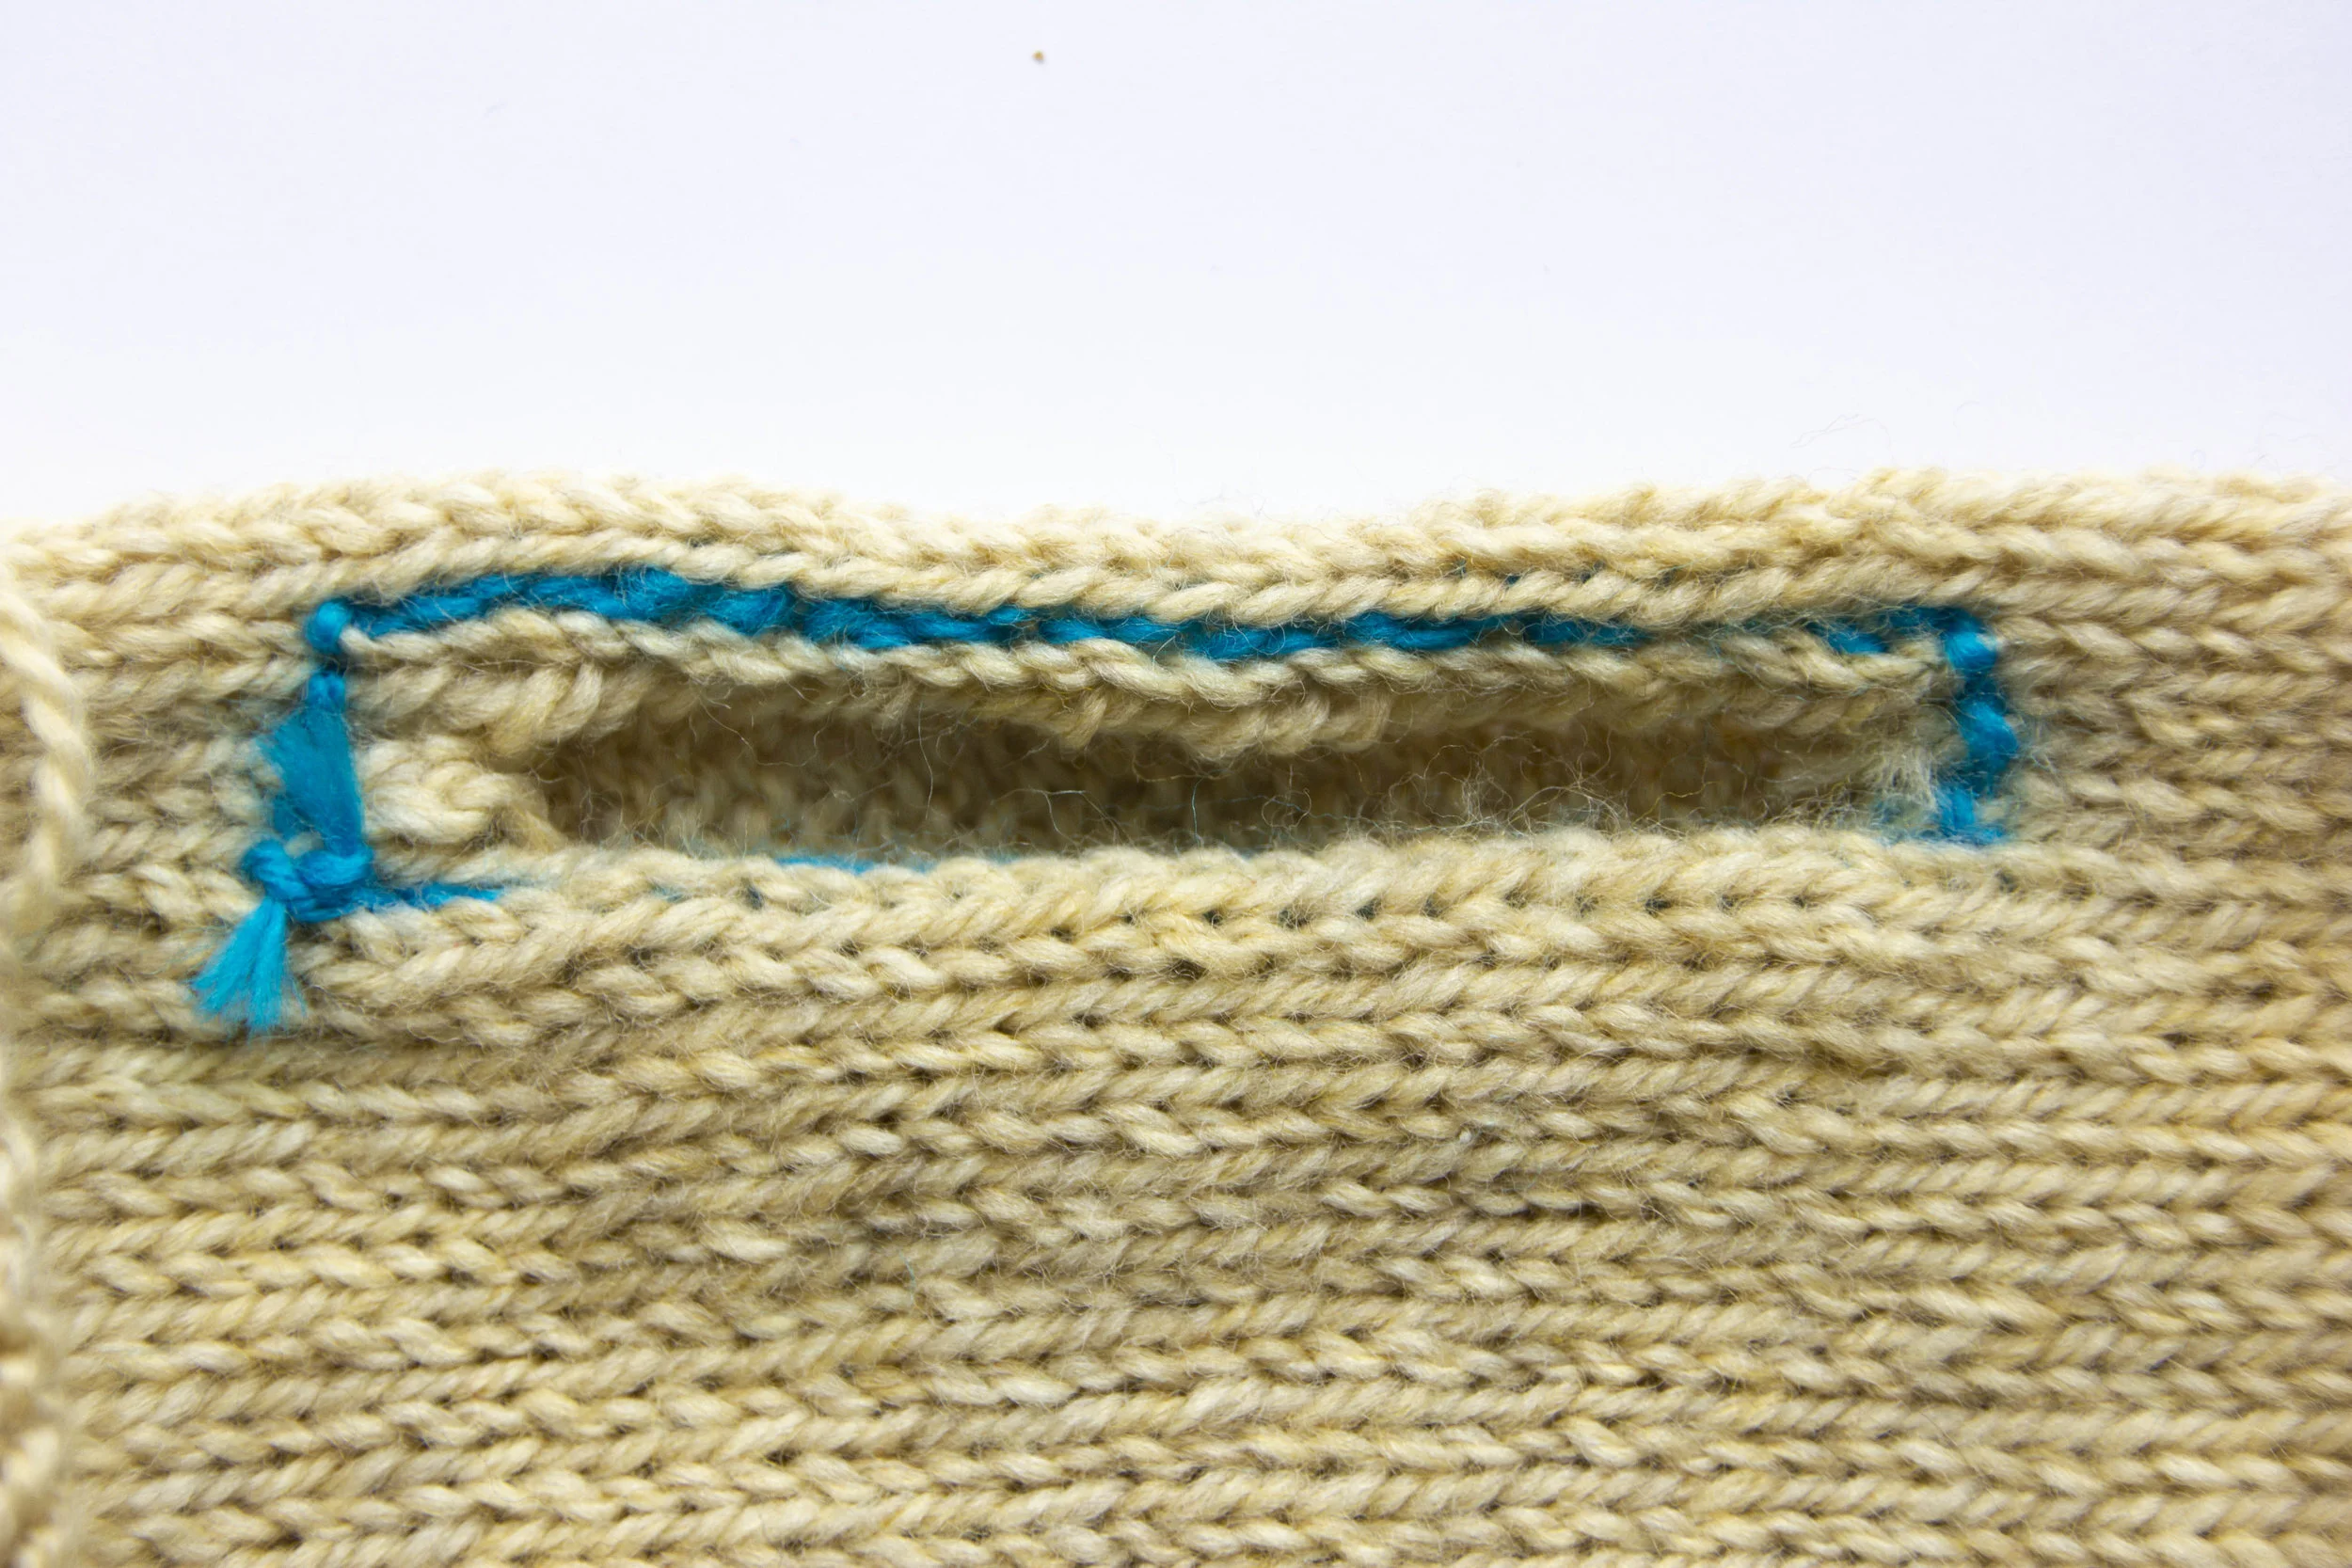
Now it looks like this and is ready to cut.

With scissors, cut the bars in the middle of the stitches in the column marked with the contrast color thread or yarn. You can pull this thread/ yarn out as you cut.
Now for finishing. To give a nice neat edge and further reinforce the steek, I suggest folding the steek edges over to the inside/ wrong side and tack it down when picking up stitches to continue knitting or with a round of crochet. You can use a sewing machine.
Crochet edge
Make a slip knot and place on your hook. Then insert the hook through half the leg of the stitch to the right or left of the back stitch line and under the adjacent back stitch bump.
Pull your yarn through. Do not pull this stitch through the stitch still on the hook. Pull yarn through the two stitches on the crochet hook.
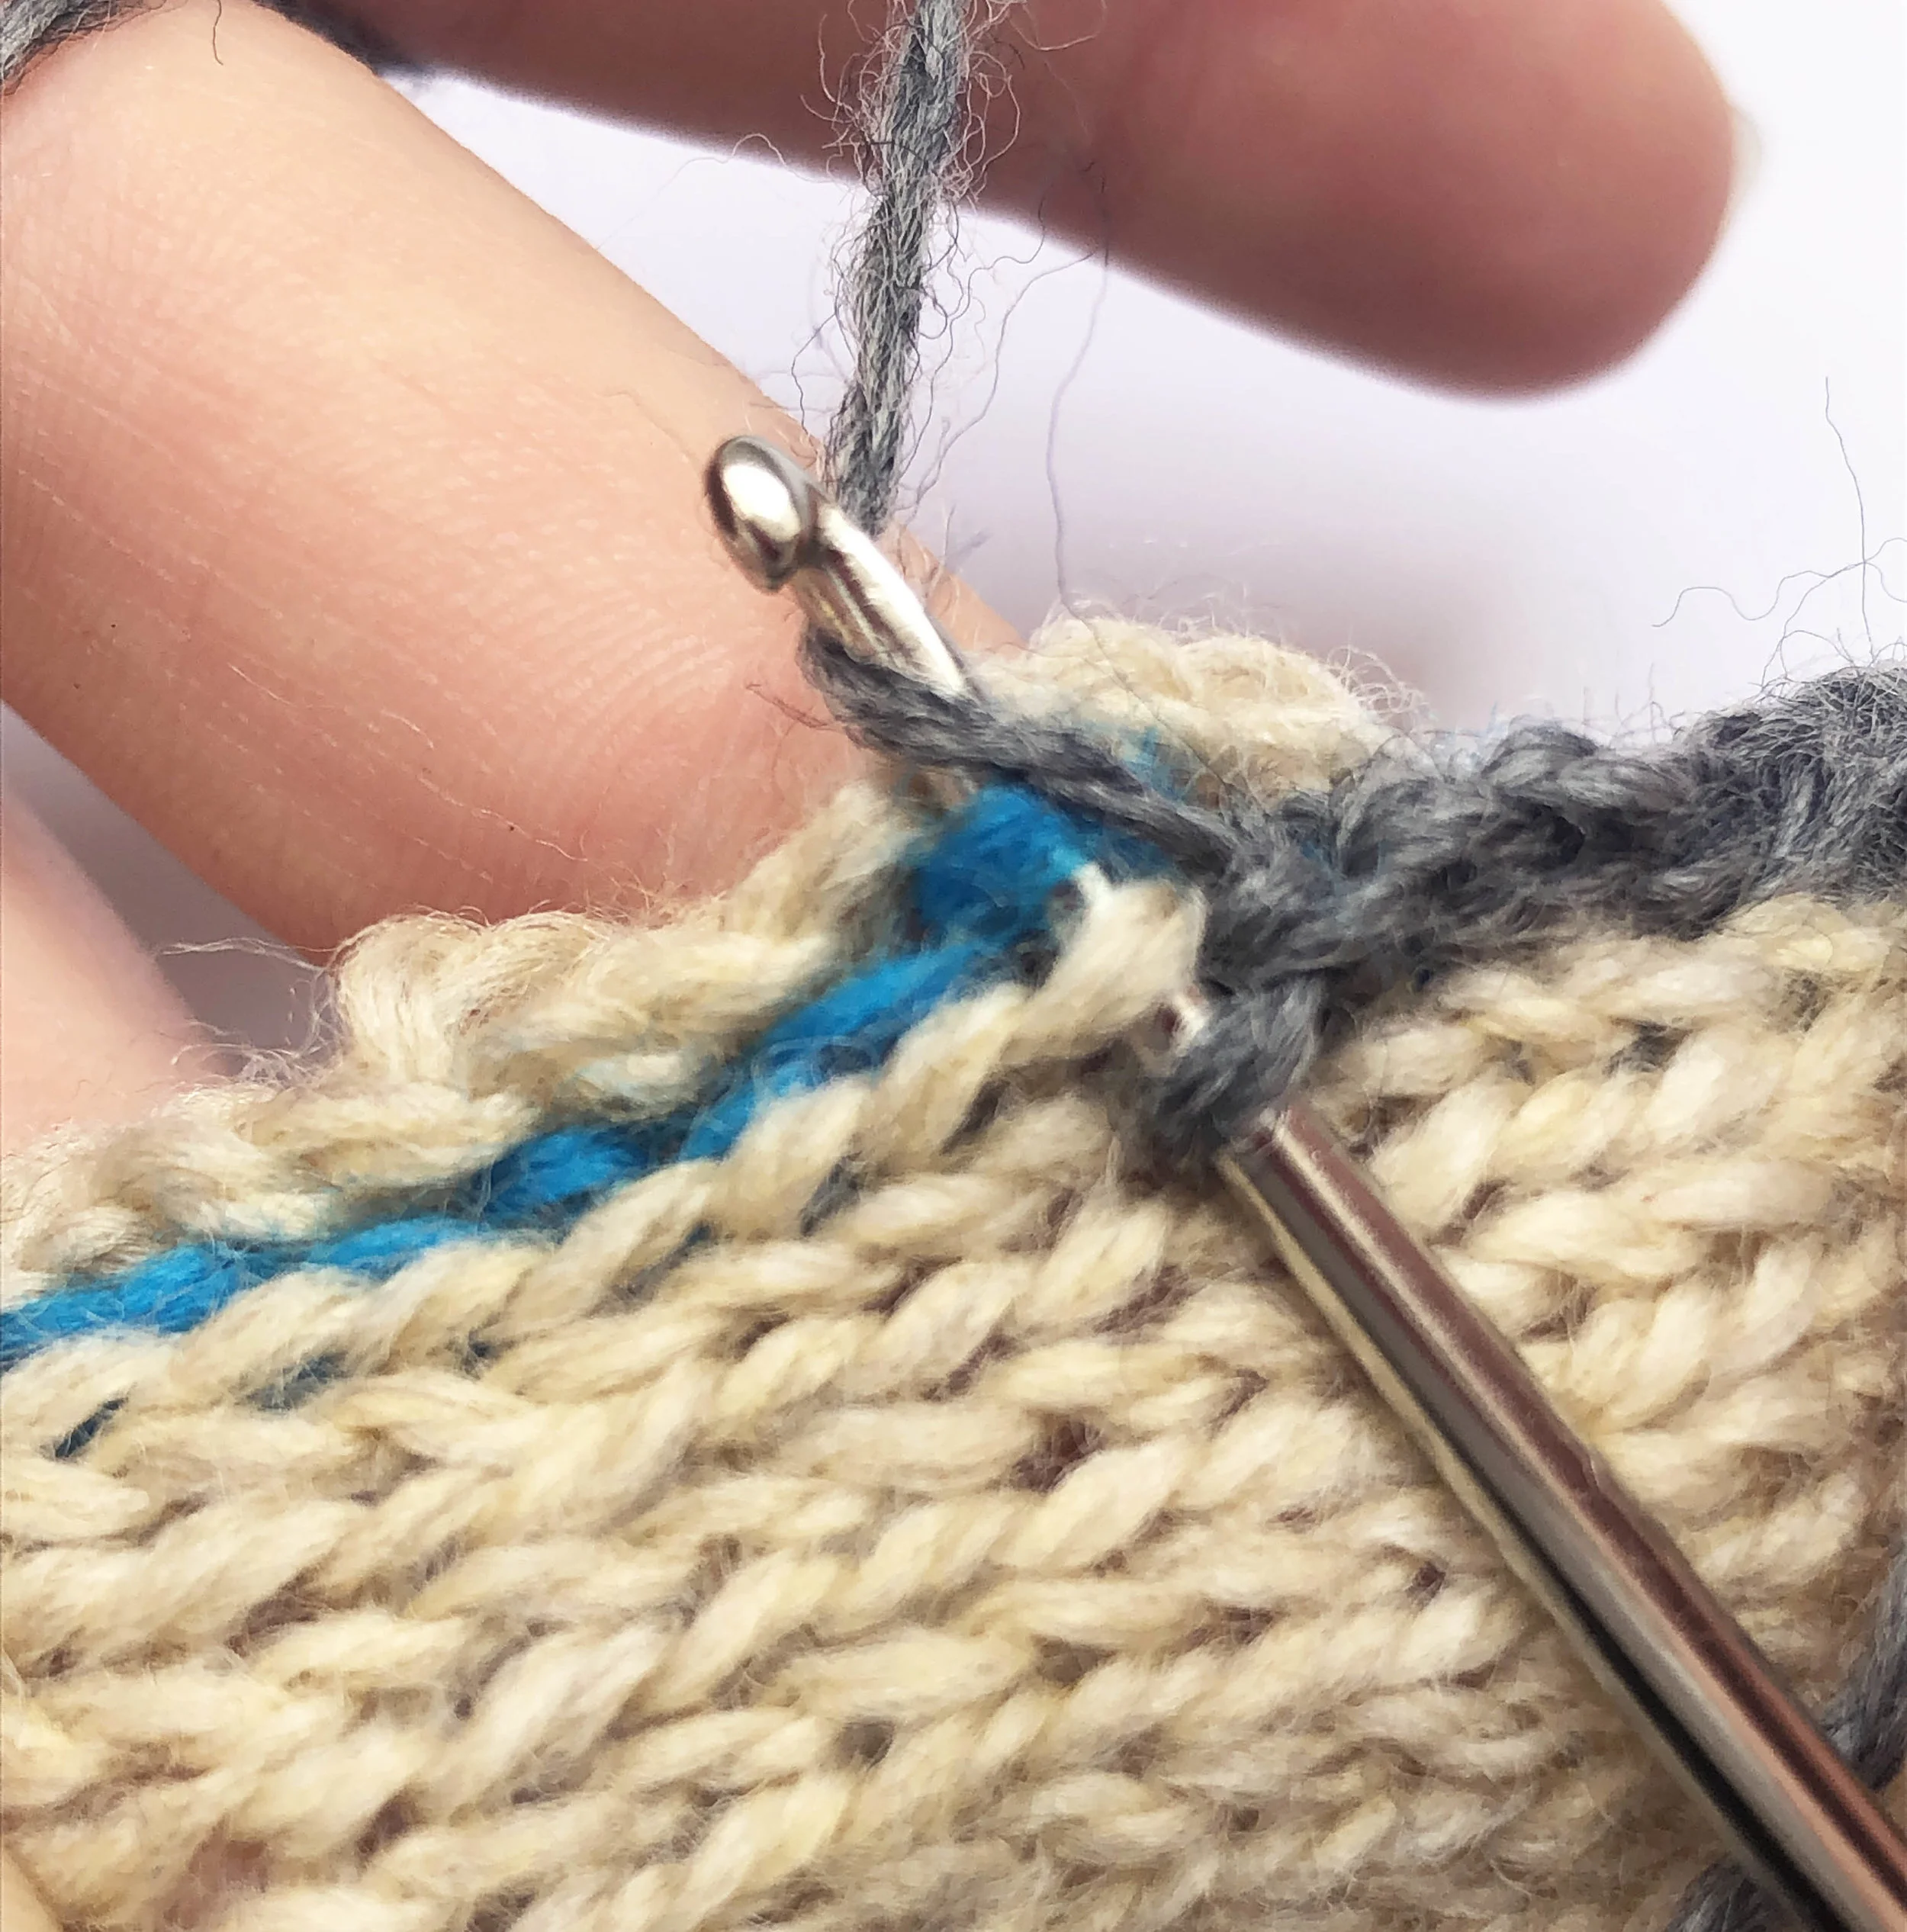
Picking up to knit
Insert the needle through half the leg of the stitch to the right or left of the back stitch line and under the adjacent back stitch bump, then pull yarn through to make a stitch. Repeat around steek.
